
System Tools We Needed
For Linux and Mac user, skip to the third bullet. For Windows user, choose between MobaXterm or Cygwin/X
 |
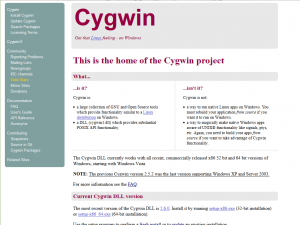 |
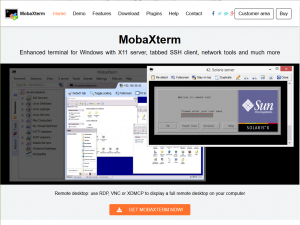
MobaXterm is toolbox for remote computing for Windows. It provides important packages: remote networking tools and Unix commands. Cygwin/X is Linux-like environment for Windows. It contains thousand of packages from Open Source including GNU tools, an X server and X applications. Cygwin/X come with small necessary packages. If you need more packages for your work, you can re-install it and select the desired packages. However, for purpose of using (to access the remote desktop) and simplicity, we recommend using MobaXterm.
-
-
-
- For MobaXterm
- It is simple! Download the setup file from the MobaXterm’s website, and run it.
- After installation completed, open MobaXterm and click Start local terminal.
- For Cygwin/X
- You may download it from Cygwin’s website. Download setup-x86.exe, if you are using 32-bit OS and setup-x64.exe if you are using 64-bit.
- If you don’t know which system type of windows you are using. Right-click at This Computer or My Computer –> properties and look at System Type.
- Run the setup program, choose Install from Internet. Then choose between All Users or Just Me.
- Next and next and choose internet connection types as Direct Connection. Then choose the packages download server.
Note: Choose the closest server, for Thailand we choose one with the suffix.sg(Singapore). - Selecting Packages: You can use search box to search for the package without press ENTER (it would takes few seconds to filtered out and show you results). Choose xorg-server and xinit and ensure that inetutils and openssh packages are selected.
- Optional Packages: (for edit file, download, etc.) wget, tar, vim, bash-completion, ca-cerificates, and curl.
- For more information see Cygwin/X installation guide and how to select the packages here.
- When the program is installed, open Cygwin Terminal and type
startxwin. When the Cygwin/X Server and X application menu appear at your taskbar (it may be hidden at the ^ symbol on your taskbar, click to see them), right-click at X application menu –> system tools –> terminal.
- For MobaXterm
-
-
For Linux and Mac user open terminal
-
-
-
- Once the terminal appear, start Secure SHell to remote SSH with provided IP and port and the flag
-X:
1[user@castor ~]$ ssh -X -p <port> user@ip.add.re.ss
The machine will ask for your password, type it and the welcome message will be displayed.
12345678910user@ip.add.re.ss's password:Welcome to NARIT RemoteStay ethical. Stay legal. Have fun. :-)The programs included with the Ubuntu system are free software;the exact distribution terms for each program are described in theindividual files in /usr/share/doc/*/copyright.Ubuntu comes with ABSOLUTELY NO WARRANTY, to the extent permitted byapplicable law. - Then connect to the head node by typing
1234[user@castor ~]$ ssh -Y yourusername@castorThe authenticity of host '192.168.5.100 (192.168.5.100)' can't be established.RSA key fingerprint is aa:bb:cc:dd:ee:ff:gg:hh:ii:jj:kk:ll:mm:nn:oo:pp.Are you sure you want to continue connecting (yes/no)?
Typeyesthen you are asked for continue connecting and press ENTER. - Try type
xeyesorxclockto check whether X Windows can be used. Another window will be appeared, shows the xeyes or clock. See this tutorials for more details.
- Once the terminal appear, start Secure SHell to remote SSH with provided IP and port and the flag
-
-
Initial Conditions with Music
We use MUti Scale Initial Condition (MUSIC) to generate initial conditions. MUSIC supports both Zel’dovich approximation (first order) and second order (2LPT) Lagrangian perturbation theory.
- Luckily, we have install MUSIC for you which can be used by load it from modulefile.
1[user@castor ~]$ module load MUSIC - Edit your parameter file, fill in some missing parameters.
Tip: When you edit a file, it is useful to copy the original file for backup, i.e.cpics.confics.conf.bak.
When you are ready, run MUSIC with your parameter file.
1[user@castor ~]$ MUSIC ./ics.conf
The initial condition file for Gadget-2,ics_gadget.dat, will be generated. Note that an output name can be changed in a configuration (.conf) file.
Installing and Run Your First Gadget-2
We provide just simple configuration ti ensure that Gadget-2 can be run with default MPI compiler (rocks-openmpi) and without HDF5 support. If you need these, the methods are described in addition configurations below.
- In the terminal, download Gadget-2.0.7 by type:
1[user@castor ~]$ wget http://wwwmpa.mpa-garching.mpg.de/gadget/gadget-2.0.7.tar.gz - The use this command to unpack the files:
1[user@castor ~]$ tar -xfz gadget-2.0.7.tar.gz - Goes to ./Gadget-2.0.7/Gadget2 and open Makefile with text editor (whatever you prefer). Comment these line by add
#:
123#OPT += -DPERIODIC#OPT += -DPMGRID=128#OPT += -DHAVE_HDF5
Save & exit. - Add SYSTYPE and the directories for required include files and libraries. For our system, we use:
123456789101112SYSTYPE="NARIT"#------------------------------ Adjust settings for target computerifeq ($(SYSTYPE),"NARIT_virt16")CC = mpiccOPTIMIZE = -O3 -Wall -m64GSL_INCL = -I/usr/include/GSL_LIBS = -L/usr/lib64/FFTW_INCL= -I/share/apps/utils/fftw-2.1.5/includeFFTW_LIBS= -L/share/apps/utils/fftw-2.1.5/libMPICHLIB = -L/usr/lib64/mpich/lib/endif
Save & exit. - To produce executable for Gadget-2, type:
1[user@castor Gadget2]$ make
then
1234[user@castor Gadget2]$ mkdir galaxy[user@castor Gadget2]$ cp Gadget2/Gadget2 galaxy/[user@castor Gadget2]$ cp Gadget2/parameterfiles/galaxy.param galaxy/[user@castor Gadget2]$ cd galaxy/ - Then edit galaxy.param, the first two lines:
12InitCondFile /your/dir/Gadget-2.0.7/ICs/galaxy_littleendian.datOutputDir /your/dir/Gadget-2.0.7/galaxy/output/
Save & exit. - To run your Gadget2, basically we type: (Note: The flag
-np2specifies the number of processors required to run Gadget).
1$ mpirun -np 2 ./Gadget2 galaxy.param
However, for using computing nodes efficiently, here we write shell script file to send our work to run.- Firstly, we create empty file
1[user@castor galaxy]$ touch jobscript.sh - Then open the file with an editor and type:
12345678910111213#!/bin/bash#$ -N Gadget2#$ -cwd#$ -j y#$ -m ea#$ -M youremail@address.com#$ -pe mpirr 2#$ -V#$ -o gadget-log#$ -e gadget-errormpirun -n $NSLOTS ./Gadget2 ./galaxy.param
Save & exit. For more information about these flags see how to submit a job using qsub. - Now send your work to computing node using
qsub
1[user@castor galaxy]$ qsub ./jobscript.sh
- Firstly, we create empty file
- The output will be generated in your output directory.
SPH Simulation
- We recommend you to read Nathan Goldbaum’ article on astrobites for the details. When you are ready, obtain initial condition to your working directory:
1[user@castor ~]$ cp -r /share/apps/simul/Gadget-2.0.7/Example/SPH/15 /your/dir/ - Goes to your Gadget2 directory. Open Makefile with an editor. Then COMMENT these lines (add
#):
123#OPT += -DPERIODIC#OPT += -DPMGRID=128#OPT += -DHAVE_HDF5
And REMOVE comment these lines (remove#):
12OPT += -DISOTHERM_EQSOPT += -DADAPTIVE_GRAVSOFT_FORGAS
Save & exit. - Then type
12$ make clean$ make
This will produce a new executable Gadget2. - Copy your new Gadget2 executable and jobscript file from previous section to 15 and navigate to this directory and edit
jobscript.sh.
1[user@castor 15]$ mpirun -n $NSLOTS ./Gadget2 ./SIC_015.param
Gadgat2 will generate many snapshot files like these:
1234snap_000snap_001snap_002... - To open this file, it requires SPH visualization suite. Here we use Gadget Viewer.
Visualization
To open snapshot files, it is require a SPH visualization suite. See SPH visualization suites.
Additional Configurations
Using Gadget-2 with HDF5
Edit Makefile by uncomment the line OPT += -DHAVE_HDF5 and add path to HDF5INCL and HDF5LIB:
|
1 2 |
HDF5INCL = -I/share/apps/utils/hdf5-1.6.5/include HDF5LIB = -L/share/apps/utils/hdf5-1.6.5/lib -lhdf5 -lz |
Then re-compile executable Gadget-2 by type make clean and make. Copy the executable file to your working directory like normal Gadget-2 file. To force Gadget-2 to produced HDF5 snapshot, open parameter file (.param) and change SnapFormat to 3. If you want Gadget-2 to read HDF5 initial condition file change ICFormat to 3.
Note: Gadget-2 is old, it support HDF5 up to version 1.6.x.
Compiling with Other MPI library
If you want to change MPI library to another one, first, you have to unload currently use modulefile and load the new one. After that, open Makefile, delete path to MPICHLIB and add new path for mpicc at CC. For example, we want to use openmpi:
|
1 |
CC = /share/apps/mpi/openmpi-1.10.2_intel2013/bin/mpicc |
Then re-compile as usual type make clean and make.