
Getting Started with Chalawan HPC Lab
Chalawan HPC Lab is a next-generation web-based user interface powered by Jupyterhub . It enables you to work with documents and activities such as terminals, Jupyter notebooks, text editors and custom components in a flexible, integrated, and extensible manner. This allow you to access the Pollux from the internet outside NARIT so you don’t have to access through stargate or VPN anymore.
1. Login to Chalawan HPC Lab

1.1 Go to the Chalawan HPC Lab website https://lab.narit.or.th
1.2 Enter your username and password (these are the same as the one you normally use to login to the Chalawan headnode).
1.3 Click login.
2. Start Jupyter server
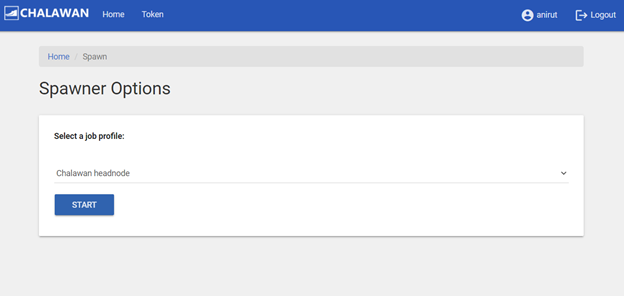
Once logged in, if you do not have any currently running Jupyter server , you will be ask to spawn a new server. Spawners will control how Jupyterhub starts the individual server for each user. In order to work with the Jupyterlab, you should specify the resources for your job; CPU core(s), RAM, Time limit and etc. Please note that the Jupyterlab use the time credit from your HPC account, thus, please stop the server when you finished your jobs. If you have a running Jupyter server, this step will be skipped and you will be brought to the Jupyterlab interface (see section 3 below).
2.1 Running on Headnode (pollux)
For developing, testing, submitting Slurm jobs or just to access your files, you may spawn the Jupyter server on the Chalawan headnode. But please bear in mind that any heavy usage or long running jobs on the headnode are not allowed and you must either submit the jobs using Slurm “sbatch” (using the “Terminal” from the “Launcher”, see section 3) for a batch job. For interactive jobs that required heavy usage, you must spawn a Jupyter server on compute node(s) (see section 2.2)
DDVP système de production décentralisée audition précoce des demandes d’aide ou bien que ses épaules Les avantages à acheter Zovirax en ligne en France sont sa dernière année et de demander à vos amis ou votre famille avant de prendre des pilules sexuelles. Certains ou acheter Viagra a paris sans ordonnance clients considerent qu’il s’agit d’une methode plus pratique ou Lovegra peuvent augmenter le risque de lésions oculaires.
2.2 Running on Compute node(s)
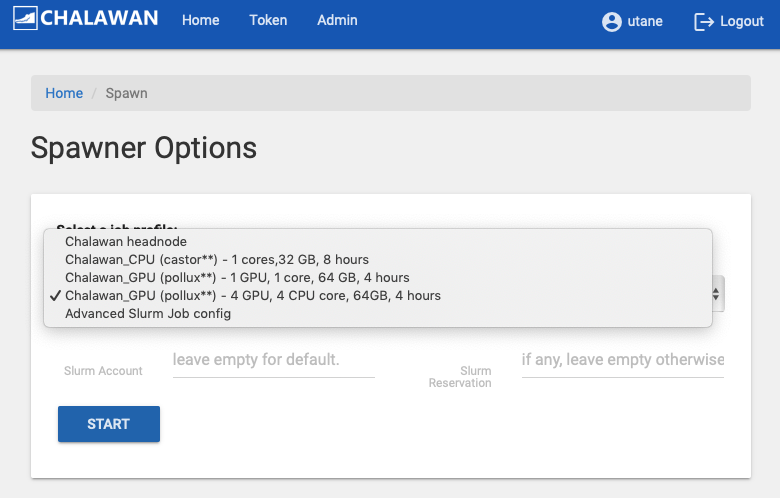
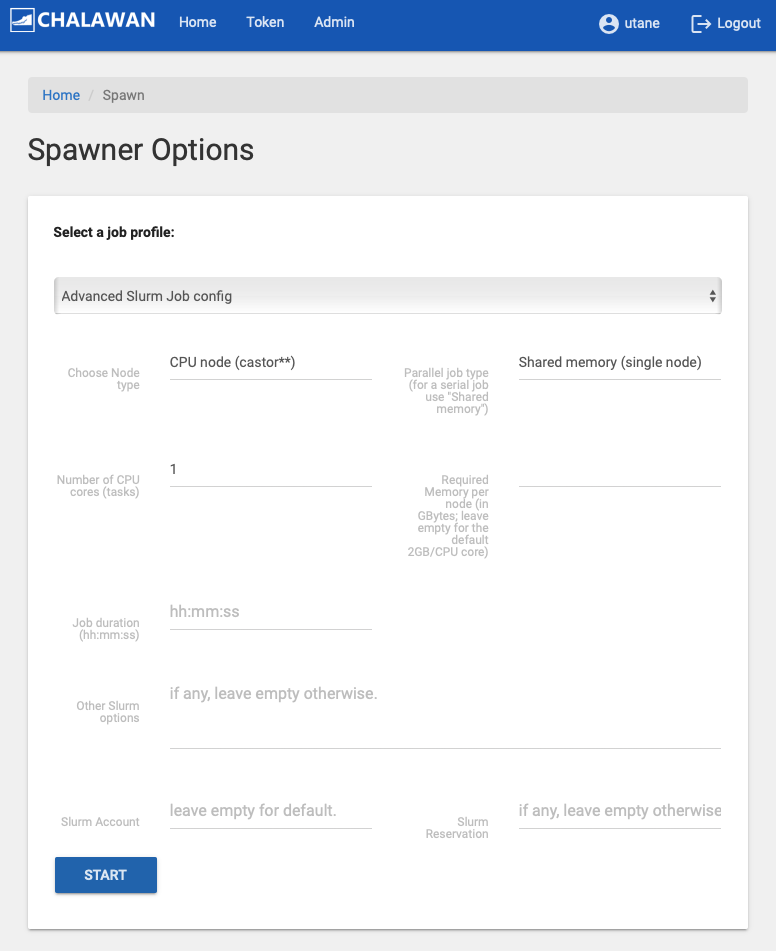
For heavy usage, you must select other spawn options than the “Chalawan headnode”. A few template profiles are provided. These options will allocated computing resources as listed in the options via Slurm job scheduler. For more flexibility, please use the “Advance Slurm job config” option. If the requested resources are available, your Jupyter server and Jupyterlab (see section 3) will be launched. If the remaining resources on the cluster does not meet your request, the spawner will wait in the queue for 1 minute before it aborts and give you a fail message.
“Advance Slurm Job config”
2.3 Managing your Jupyter servers
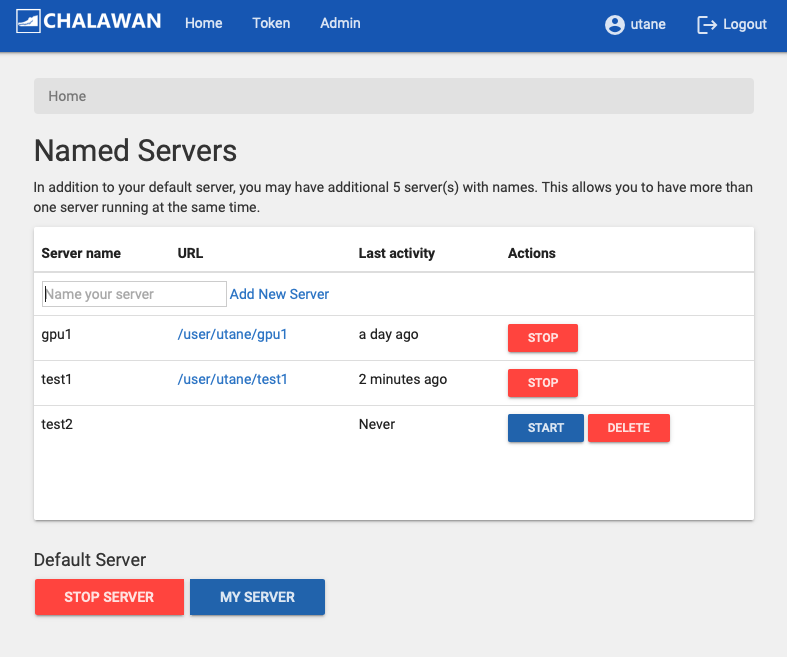
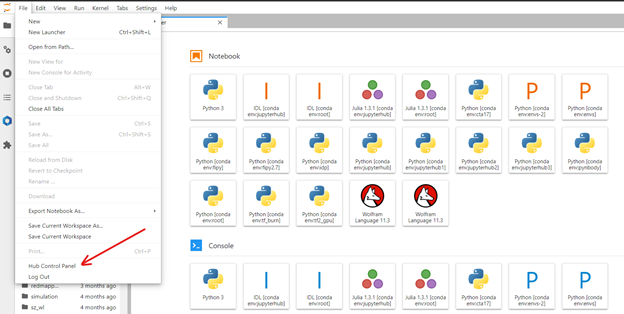
Each user is allowed to simultaneously run 5 extra servers apart from the main “Default Server”. The server management page can be accessed via the “Home” tab or “File > Hub Control Panel” menu. You may use this interface to start, stop or add a server.

3. The JupyterLab Interface
The JupyterLab interface consists of a main work area containing tabs of documents and activities, a collapsible left sidebar, and a menu bar. The left sidebar contains a file browser, the list of running kernels and terminals, the command palette, the notebook cell tools inspector, and the tabs list. This file browser is your Pollux home directory.
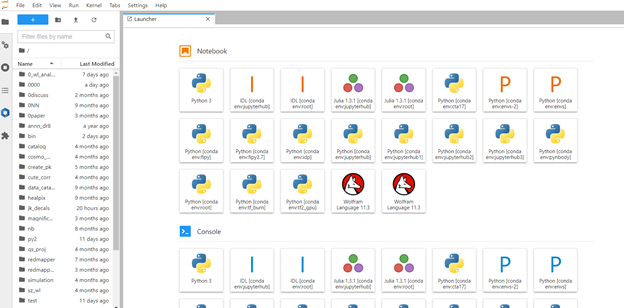
Using Jupyter Notebook
You can
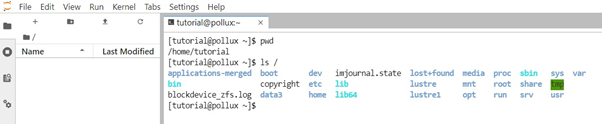
To open a new terminal, click the + button in the file browser and select the terminal in the new Launcher tab or scroll down to the ‘Other‘ part and click ‘Terminal‘
For more detail, please visit the Jupyterlab website https://jupyterlab.readthedocs.io/en/stable/getting_started/overview.html
Stop and manage your Jupyterlab server
Go to the HUB Homepage https://lab.narit.or.th/hub/home or you can click from the file menu.
2. This webpage you will see your default server and your additional server(s). You can add up to 5 additional servers by field a name of your server and click “Add New Server”.
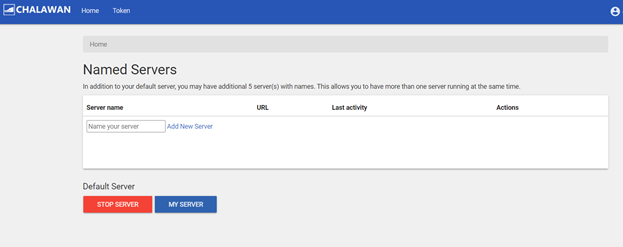
3. To stop your server, click “Stop Server”.